Download Windows-11-Pro.iso [All versions & Workstations] from Microsoft
My PC from eBay.com a HP Z640 – default language: de-de, change to us-en
Bypass Restrictions of Win-11 Pro for WS: upgrade 22H2 to 23H2 *
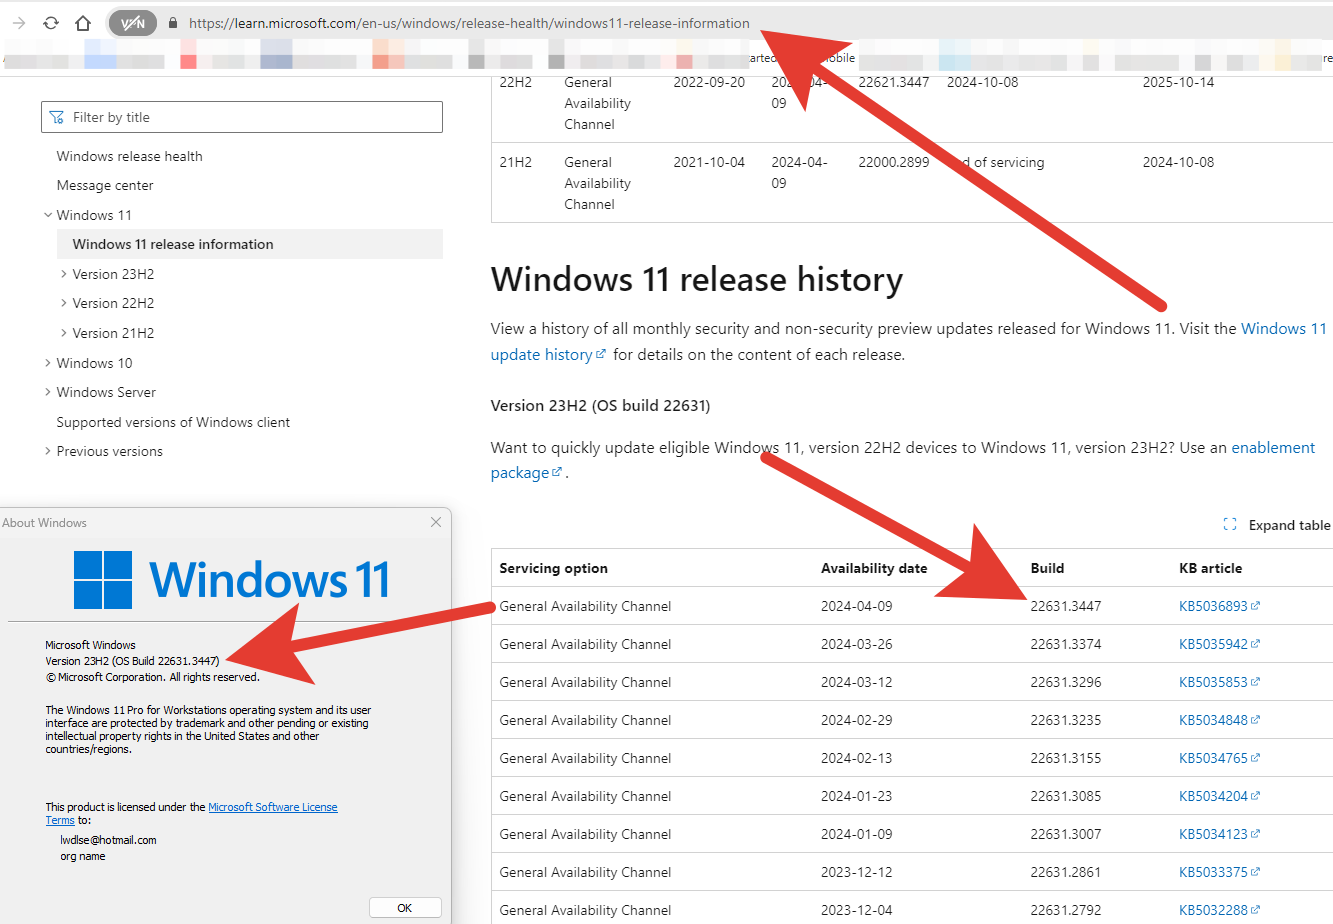
After upgrading from 22H2 to 23H2, Windows 11 Pro for Workstations, some minor updates may be needed
Buy Cheap Software keys – Windows 11/10 Pro for Workstations, Windows 11 Pro, Home, etc. **
* Instructions given – This method DOES NOT USE 3rd Party Tools. It does use the Official Windows11.iso from the Microsoft website – download, and some CLI commands – All Safe === All Microsoft…!!!!!!!!!!!!!!!!!!!!!!!!!
** Windows 11/10 Pro for Workstations can be installed on any PC, but to make use of all of its functions and power, needed Workstation PC is needed, eg, Intel XEON processor, ECC RAM, Professional Graphics card… etc.
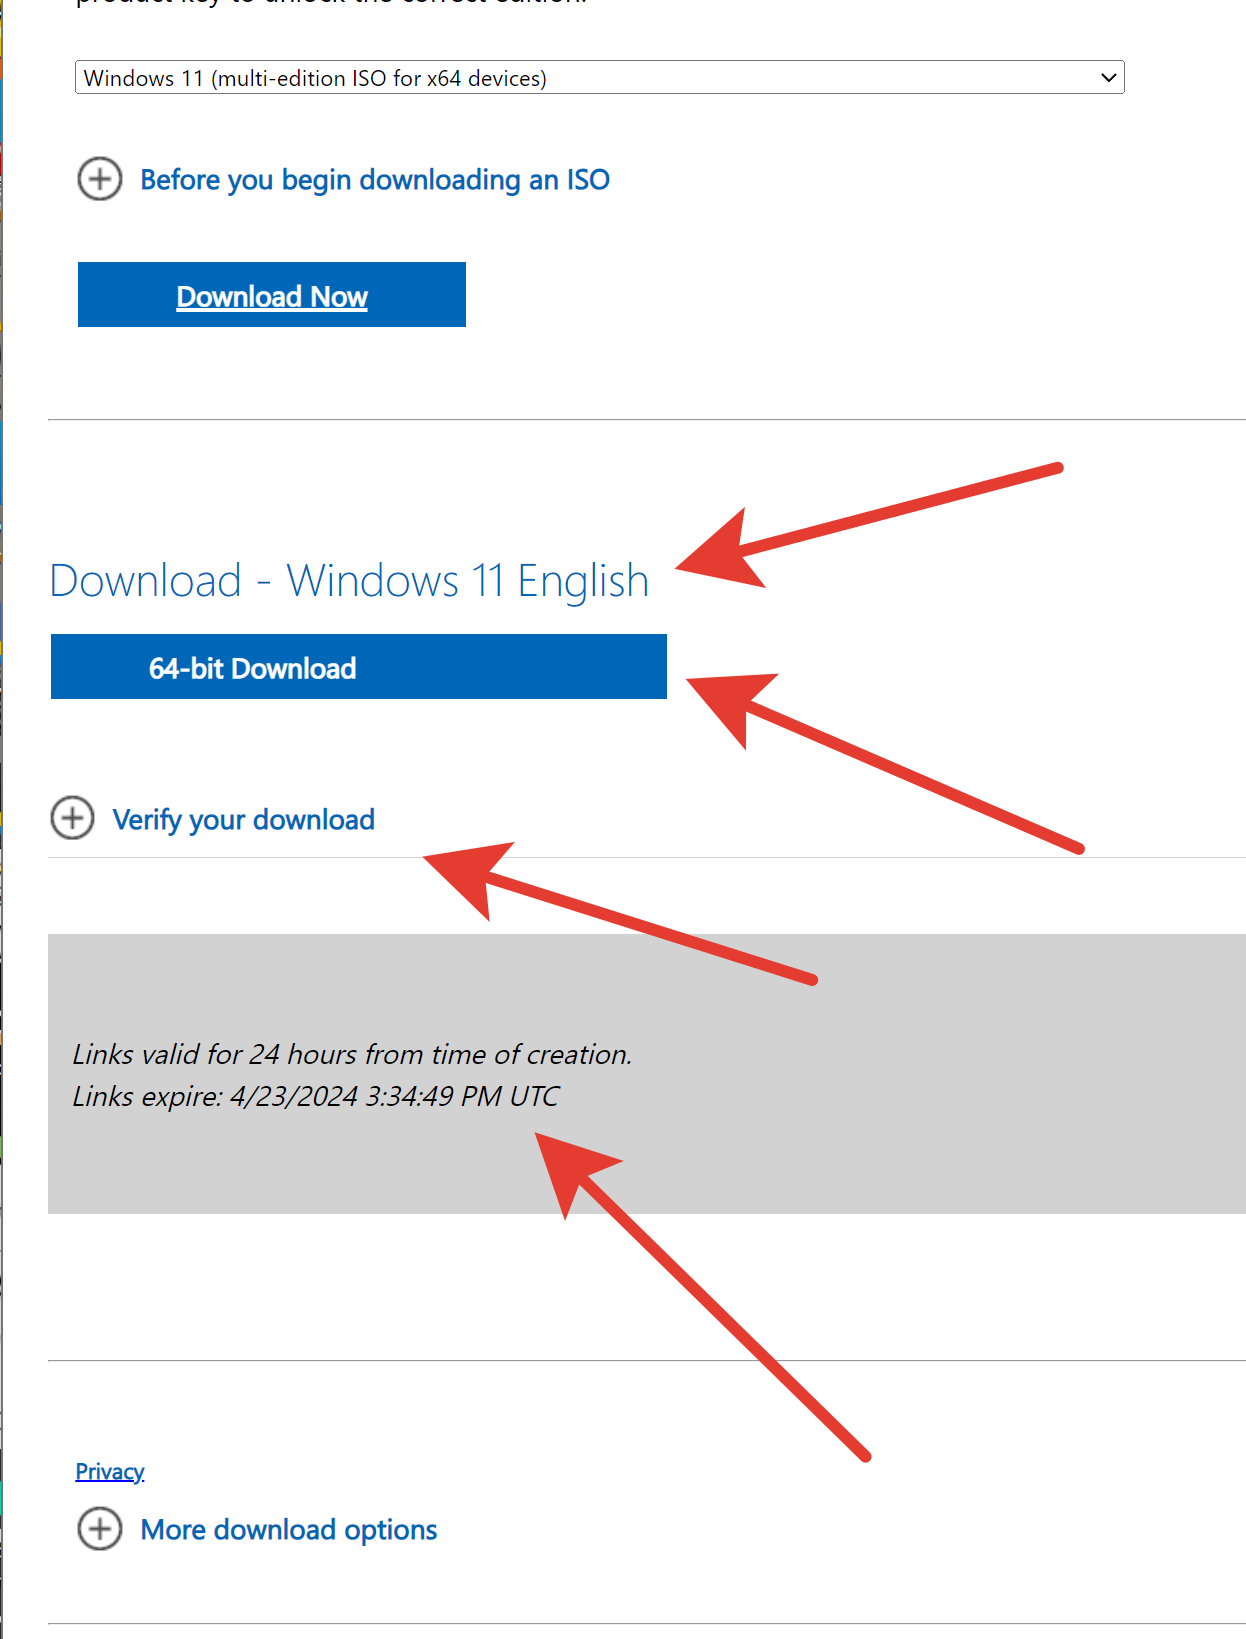
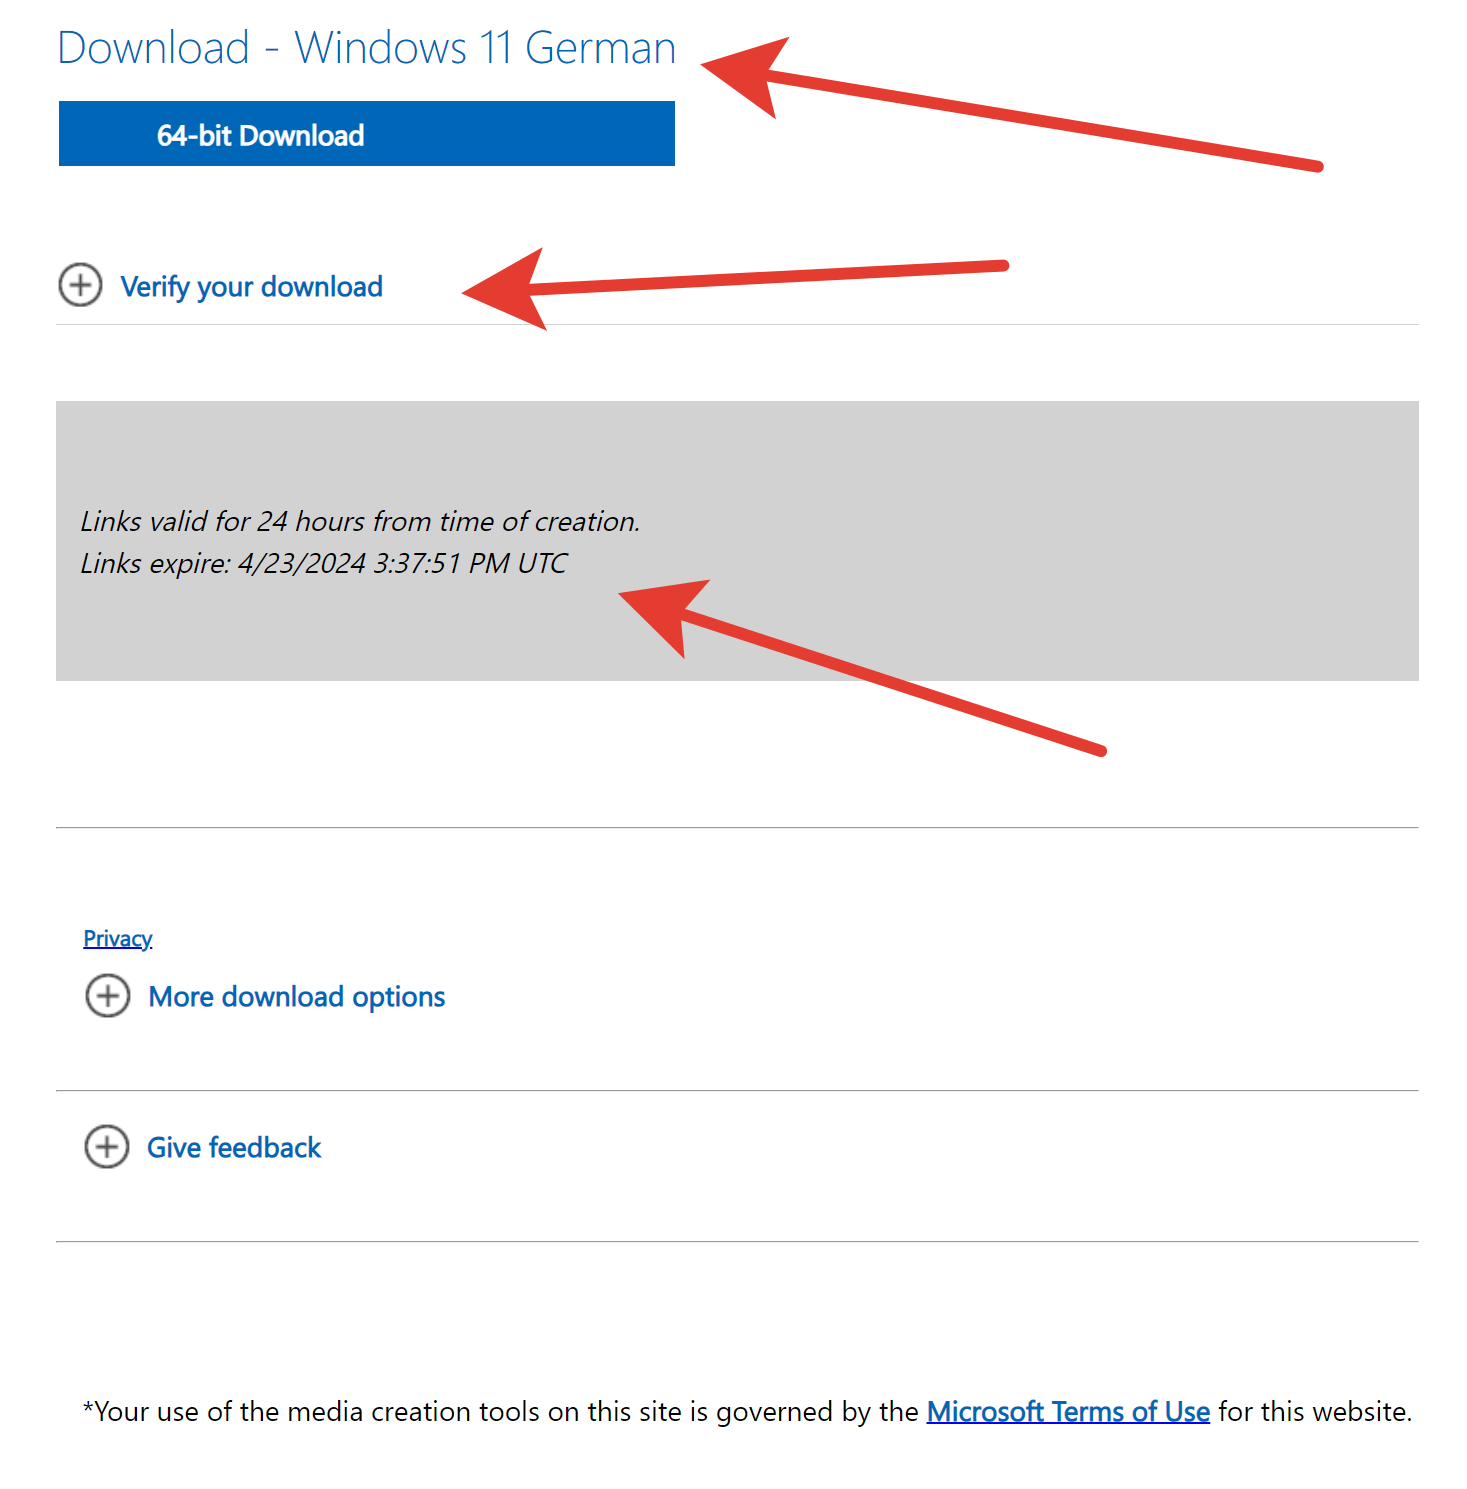
1- Download Windows-11-Pro.iso [All versions & Workstations] from Microsoft
2- My PC from eBay.com a hp z640 – default language: de-de, change to us-en
If proceed with Upgrade from 22H2 to 23H2:
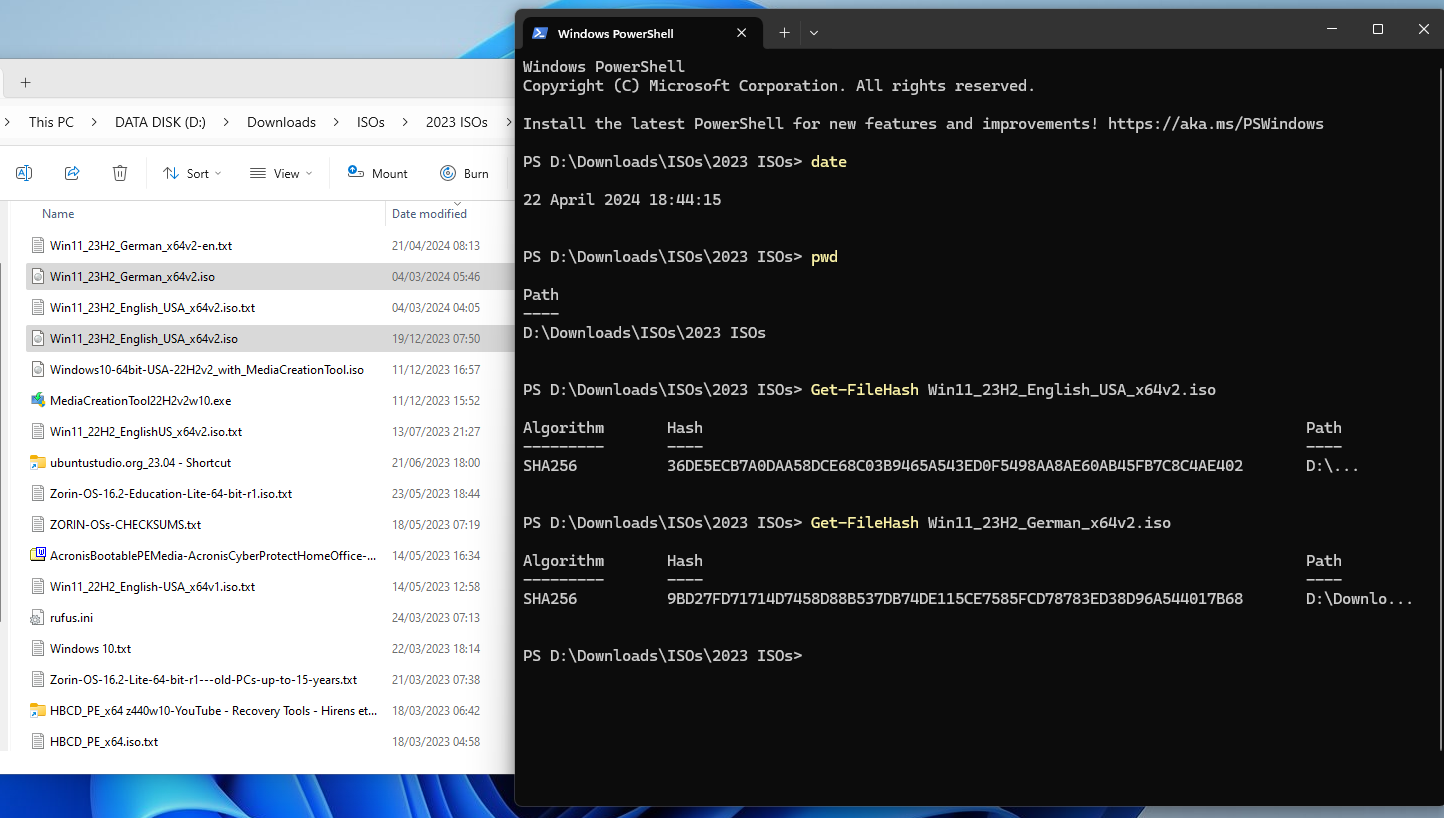
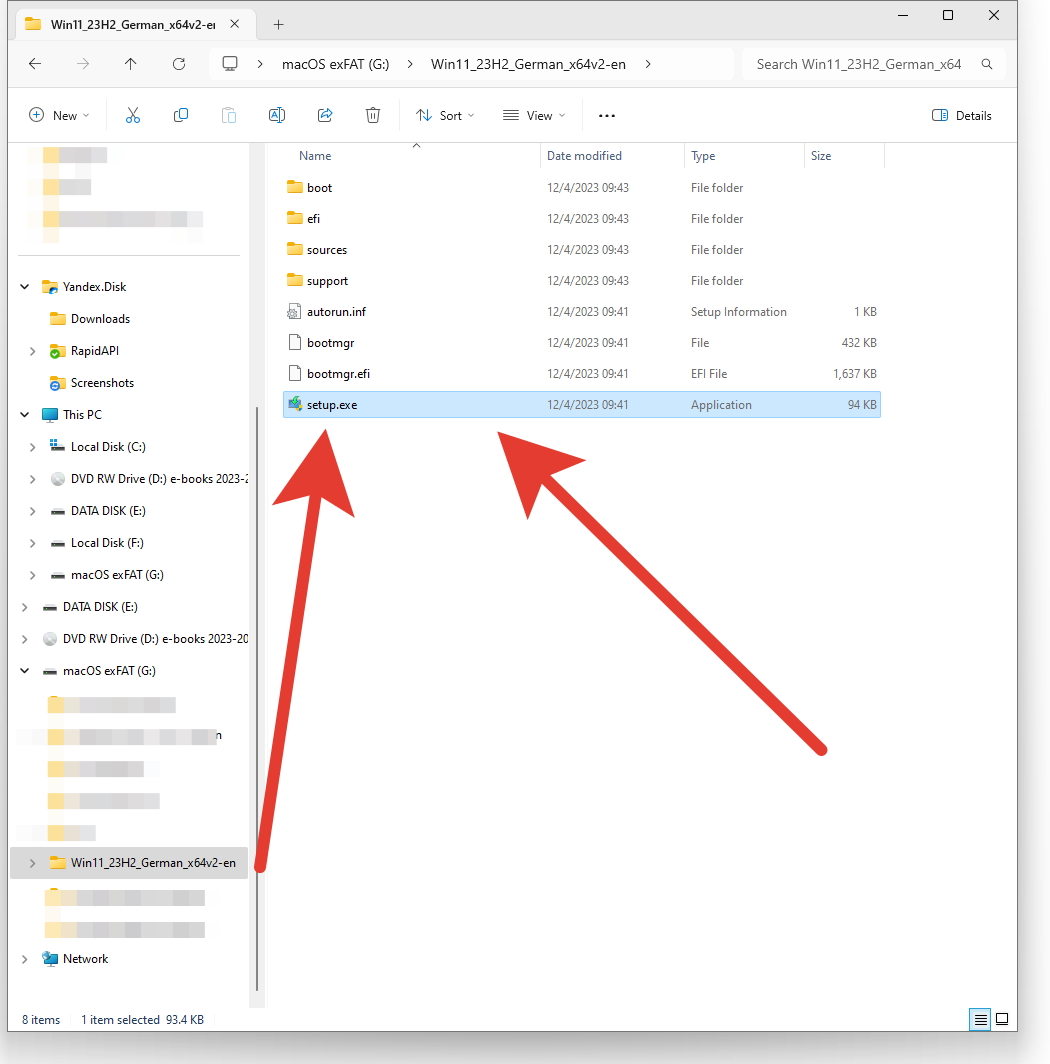
Normally will run the file setup.exe in the root file structure of the ISO. BEFORE DO THIS the ISO file gets burned on DVD, mounted to a drive, or extracted from ISO to a USB Stick location. You have to do this for both ISOs
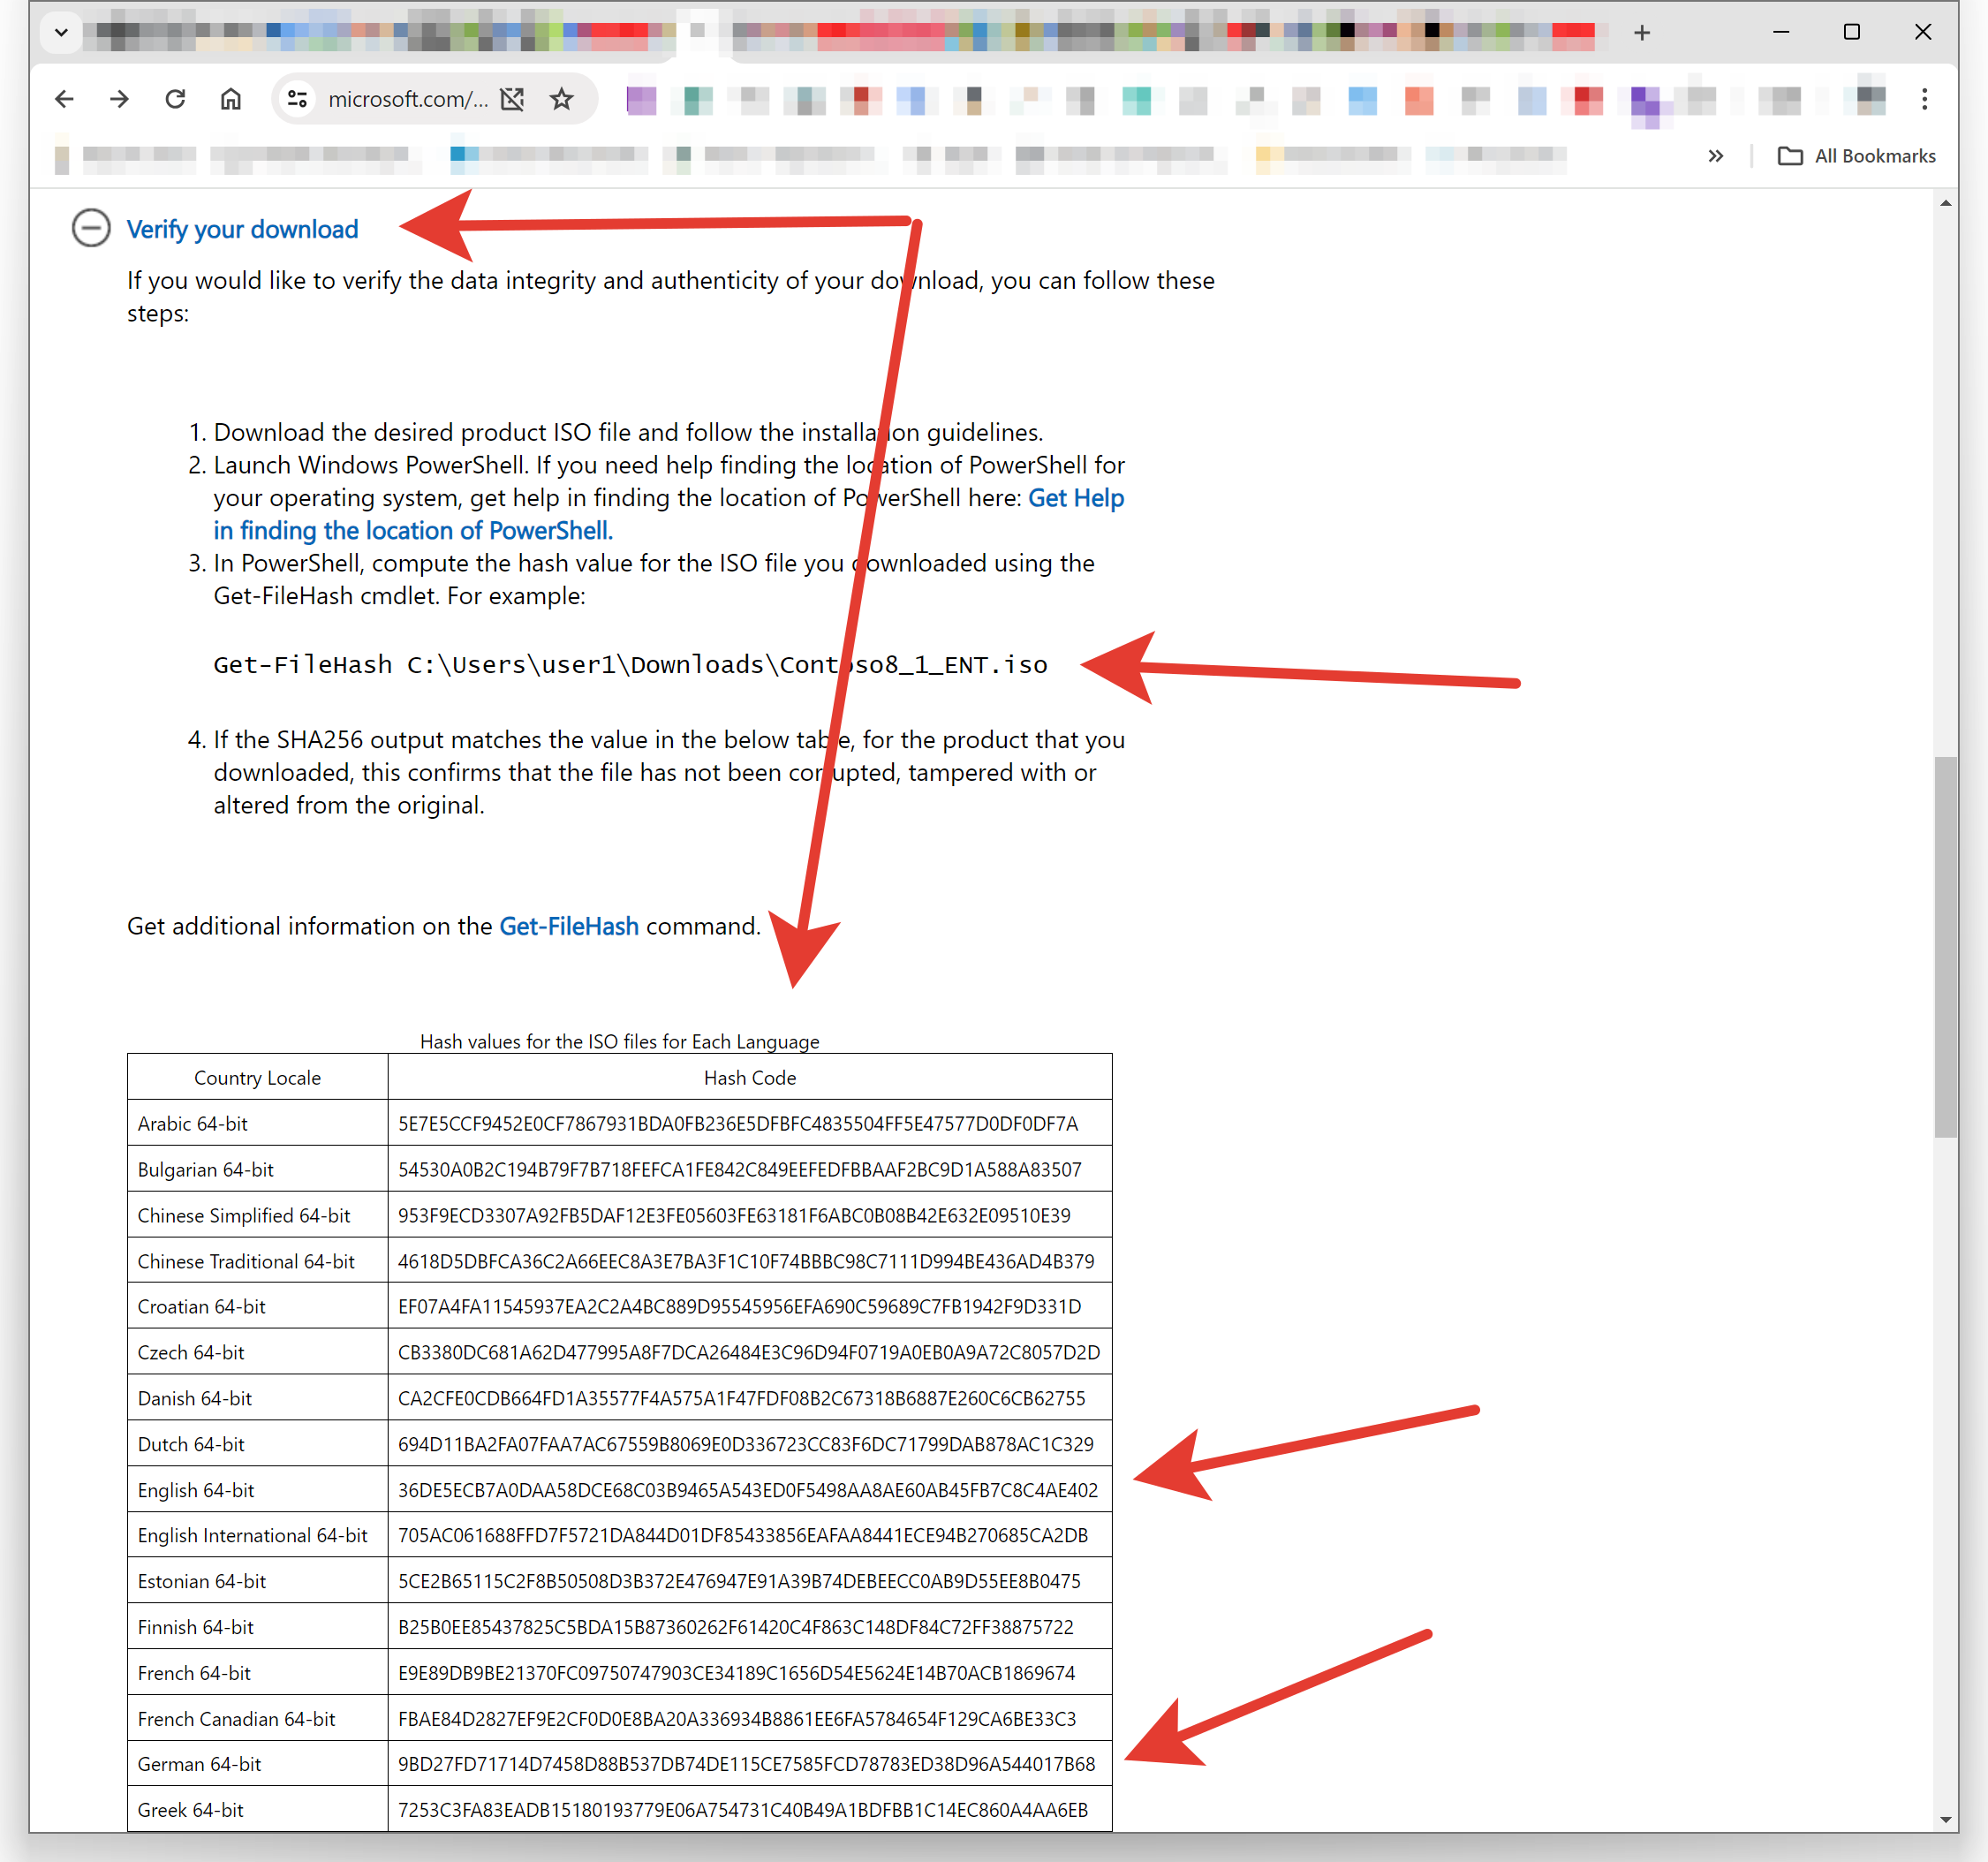
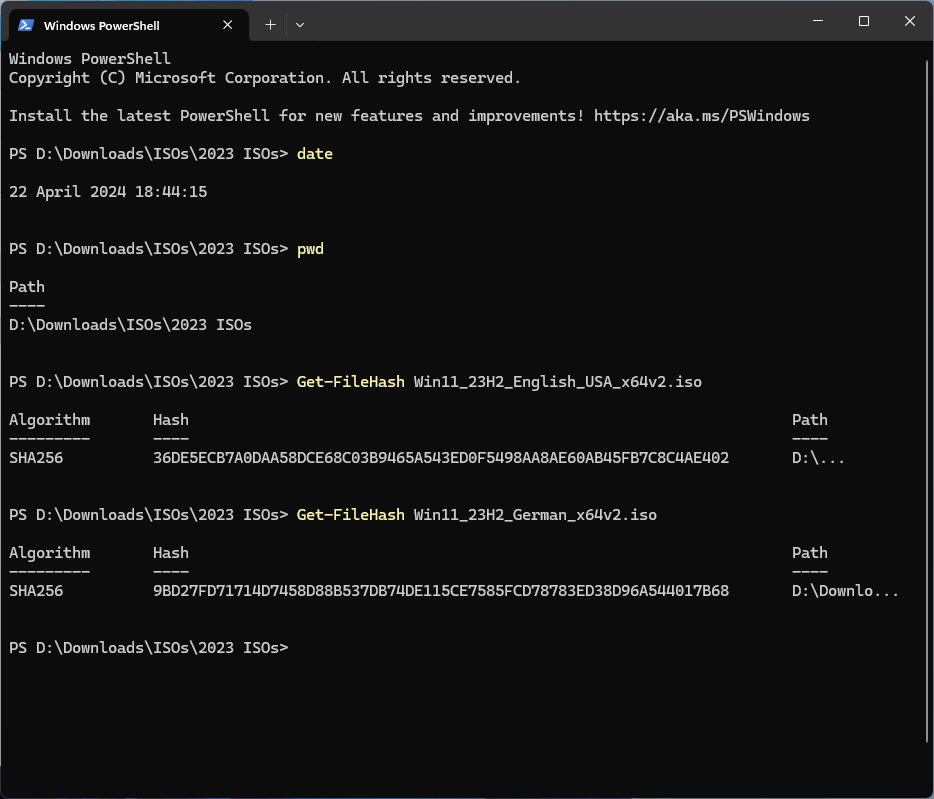
Win11_23H2_German_x64v2.iso and Win11_23H2_English_USA_x64v2.iso
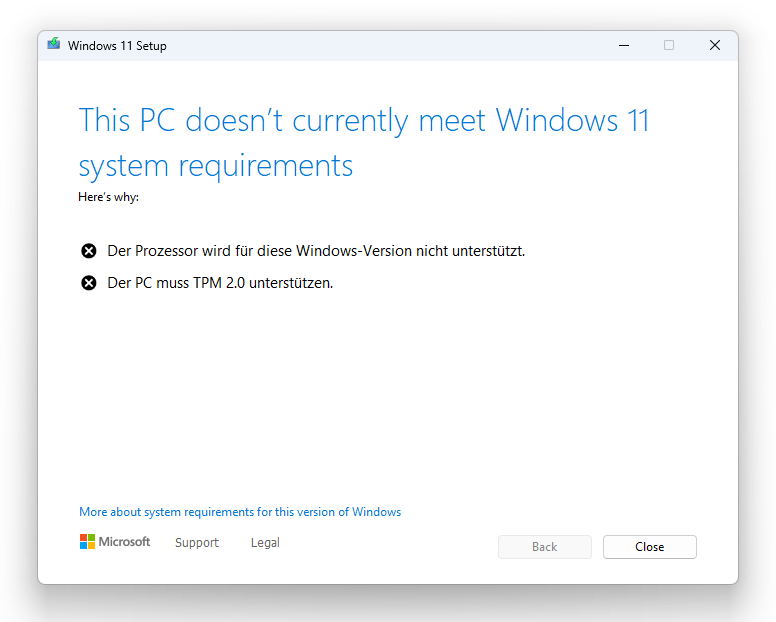
There are 2 problems Language should be de-de/German and hardware restrictions.
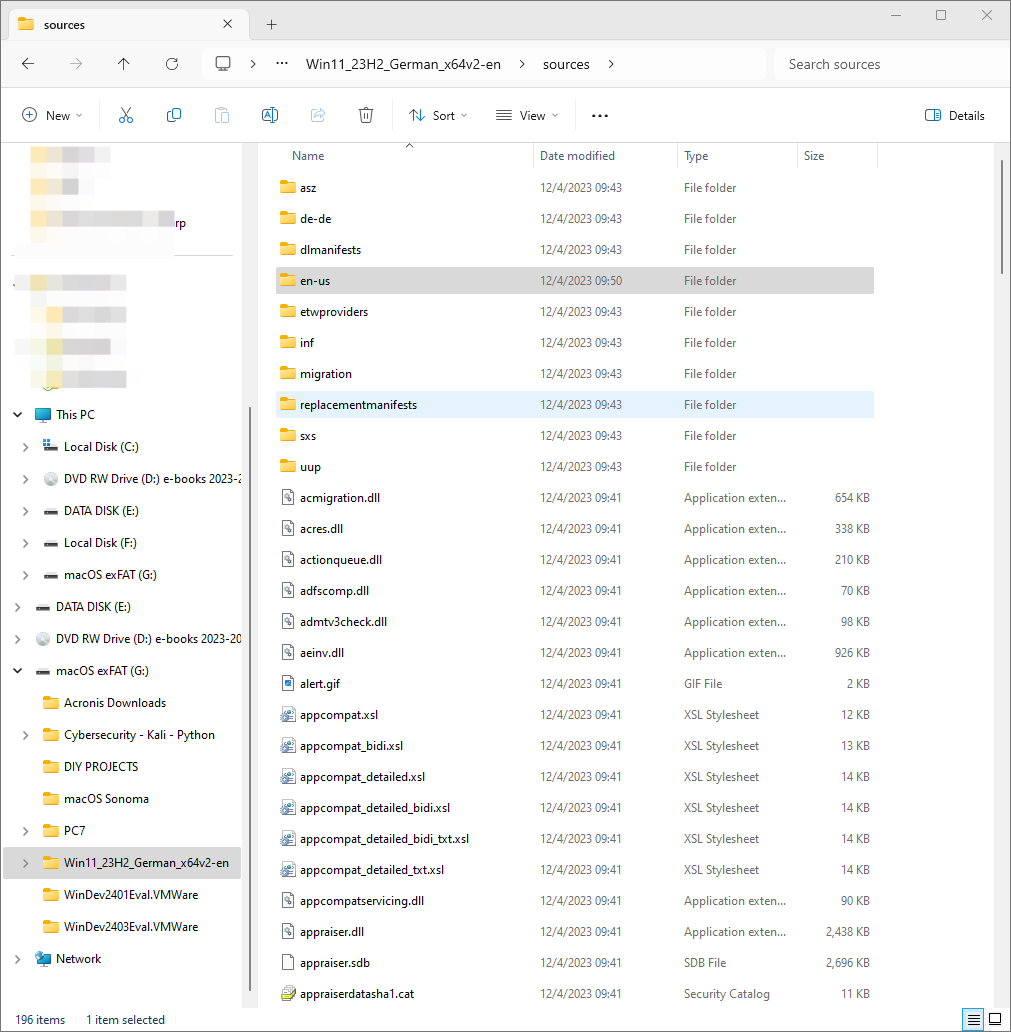
To bypass the language in the Win11_23H2_German_x64v2.iso extraction replace the folder:
G:\Win11_23H2_German_x64v2-en\sources\de-de
with
Win11_23H2_English_USA_x64v2\sources\en-us\
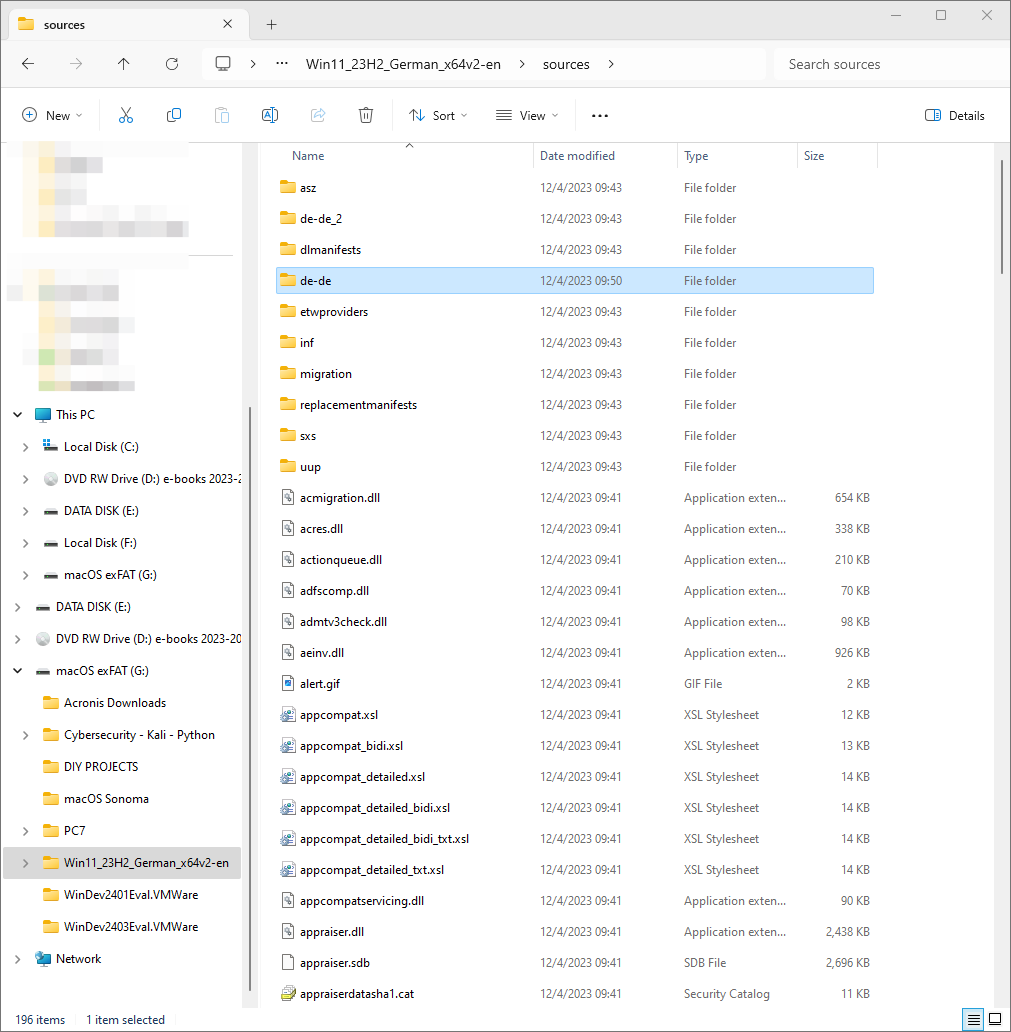
We proceed as follows: copy the Win11_23H2_English_USA_x64v2\sources\en-us\ to G:\Win11_23H2_German_x64v2-en\sources\
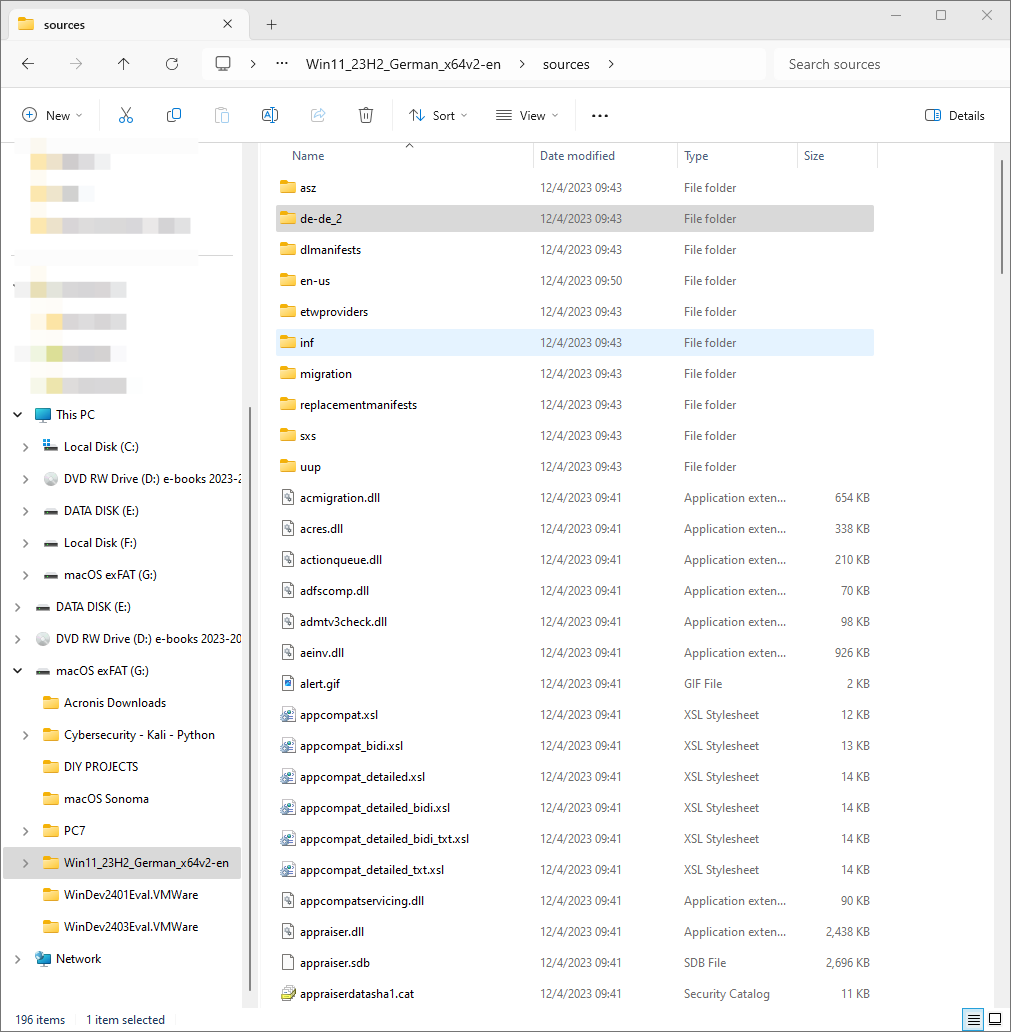
Rename the:
G:\Win11_23H2_German_x64v2-en\sources\de-de\
to
G:\Win11_23H2_German_x64v2-en\sources\de-de_2\
and the H:\Win11_23H2_German_x64v2-en\sources\en-us\ to G:\Win11_23H2_German_x64v2-en\sources\de-de\ .
This way I can follow in ENGLISH during the upgrade as I do not know German, see screenshots:
3- Bypass Restrictions of Win-11 Pro for WS: upgrade 22H2 to 23H2 *
The last step is to start the Upgrade process from 22H2 to 23H3. If the hardware supports Windows 11, we proceed to run the:
“G:\Win11_23H2_German_x64v2-en\setup.exe”
But the hardware is unsupported:
So, we proceed as follows:
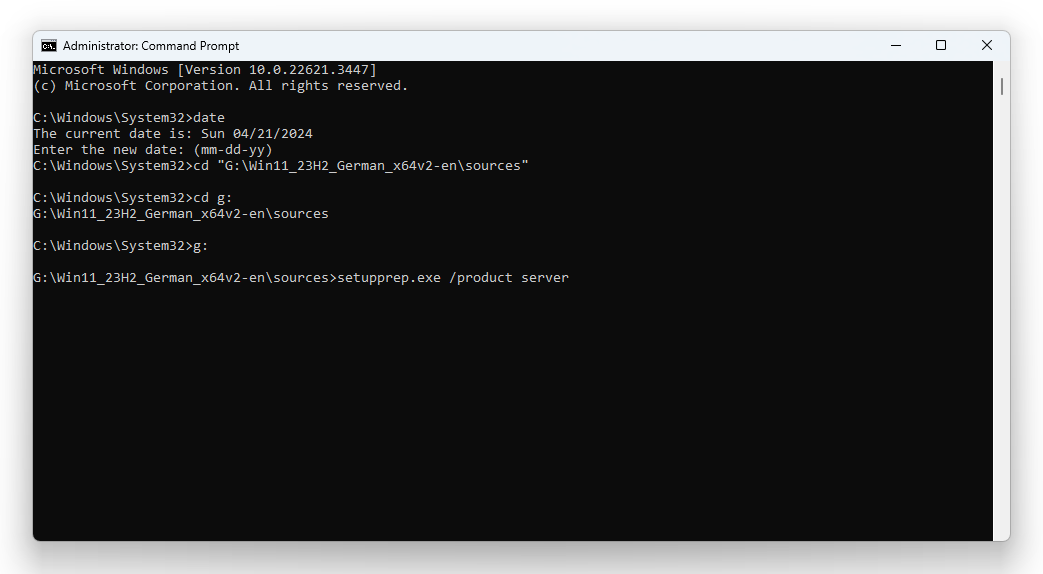
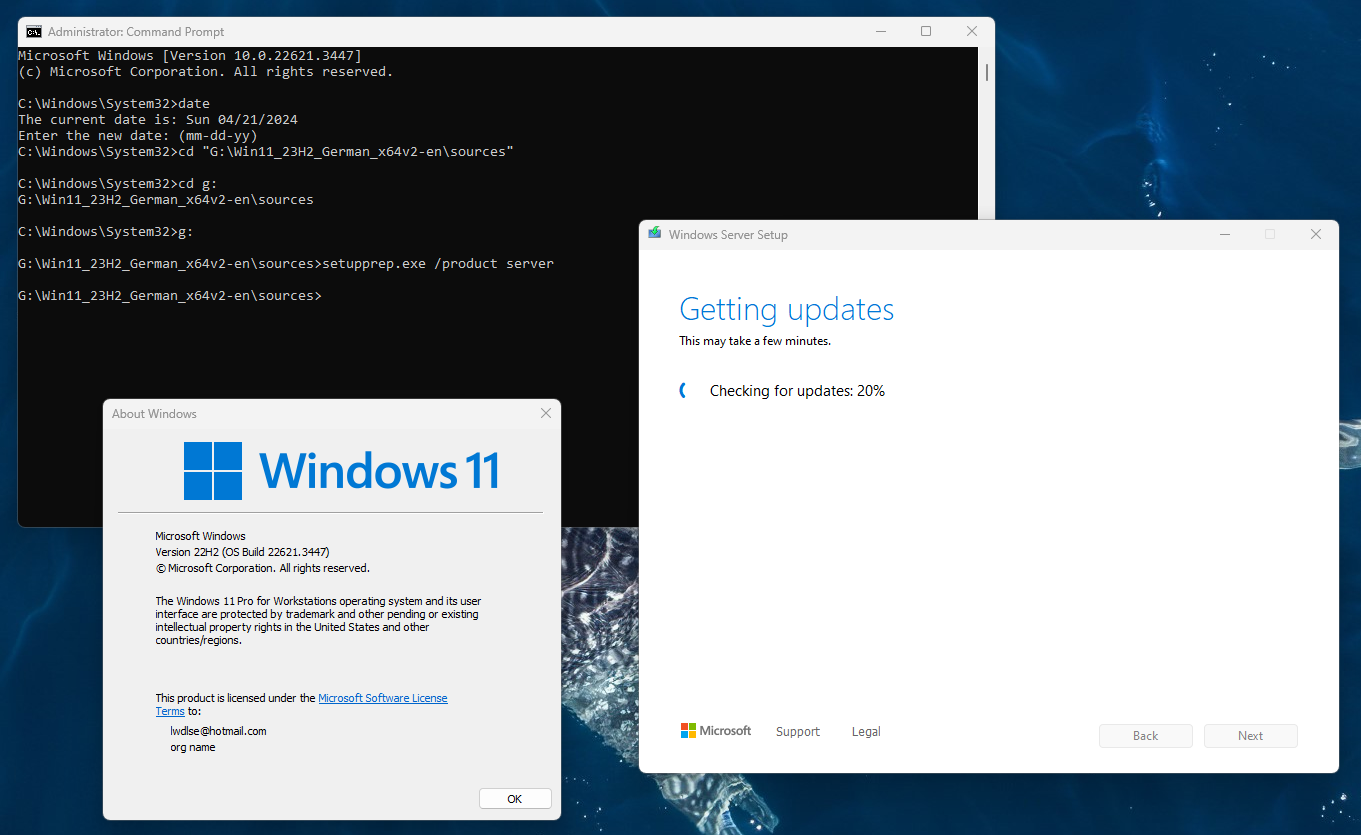
Open CLI as Administrator and go to the folder:
G:\Win11_23H2_German_x64v2-en\sources\
THEN WE GIVE THE COMMAND:
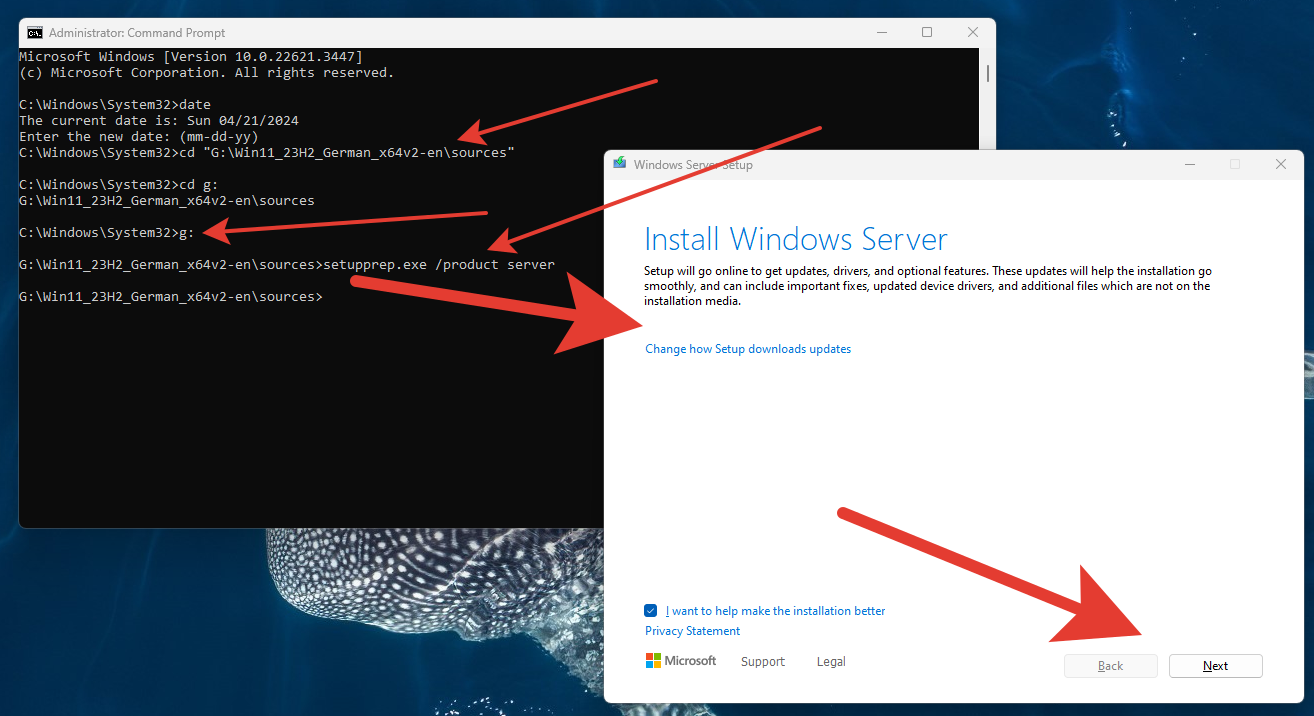
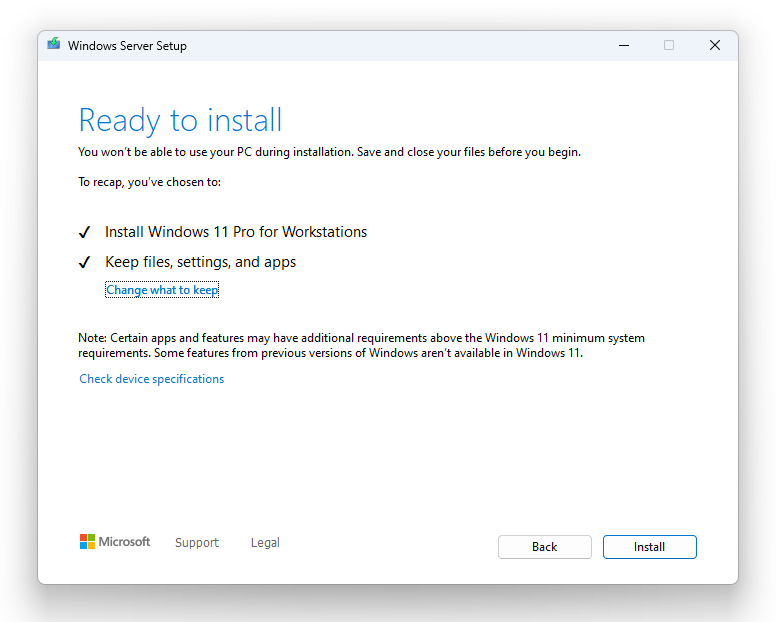
setupprep.exe /product server
This will start the upgrade process ignoring the Hardware Restrictions of Windows 11.
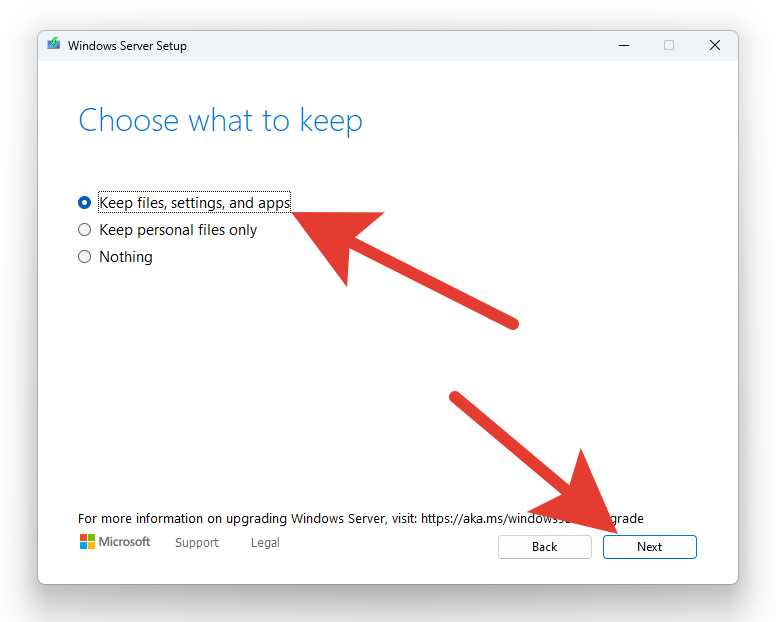
Please ignore the “Install Windows Server” – It does not matter – it is upgrading the OS in which you run it, in our case Windows 11 Pro for Workstations – but, can also be Windows 11 Home, Windows 11 Pro, if e.g. Home or Pro, Windows 11.
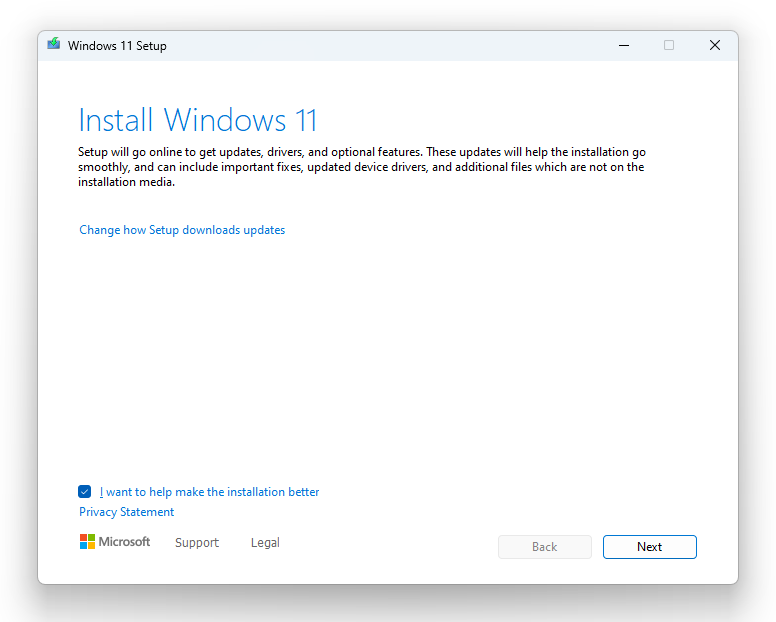
Press “Next”
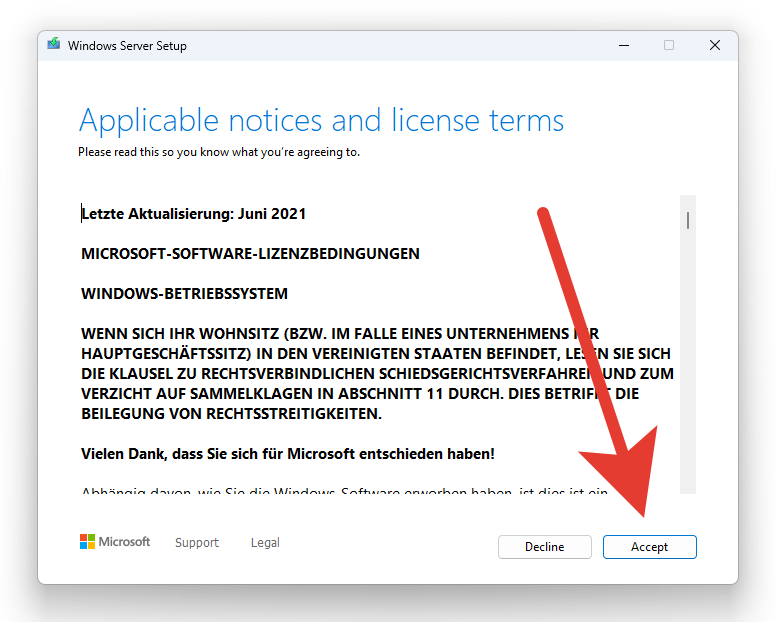
Press “Accept”
Press “Next”
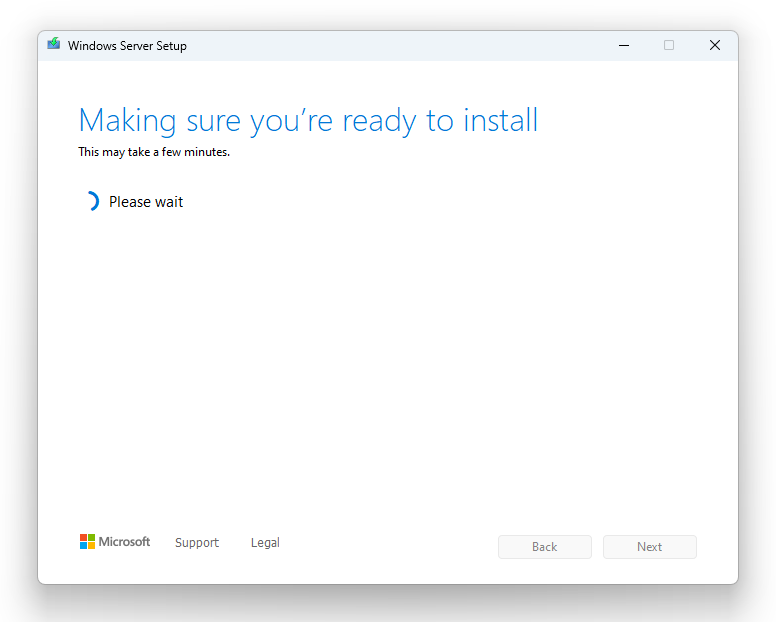
Press “Install”. [If you use a PC I recommend a UPS or if you use Laptop Plug-in the power cord]
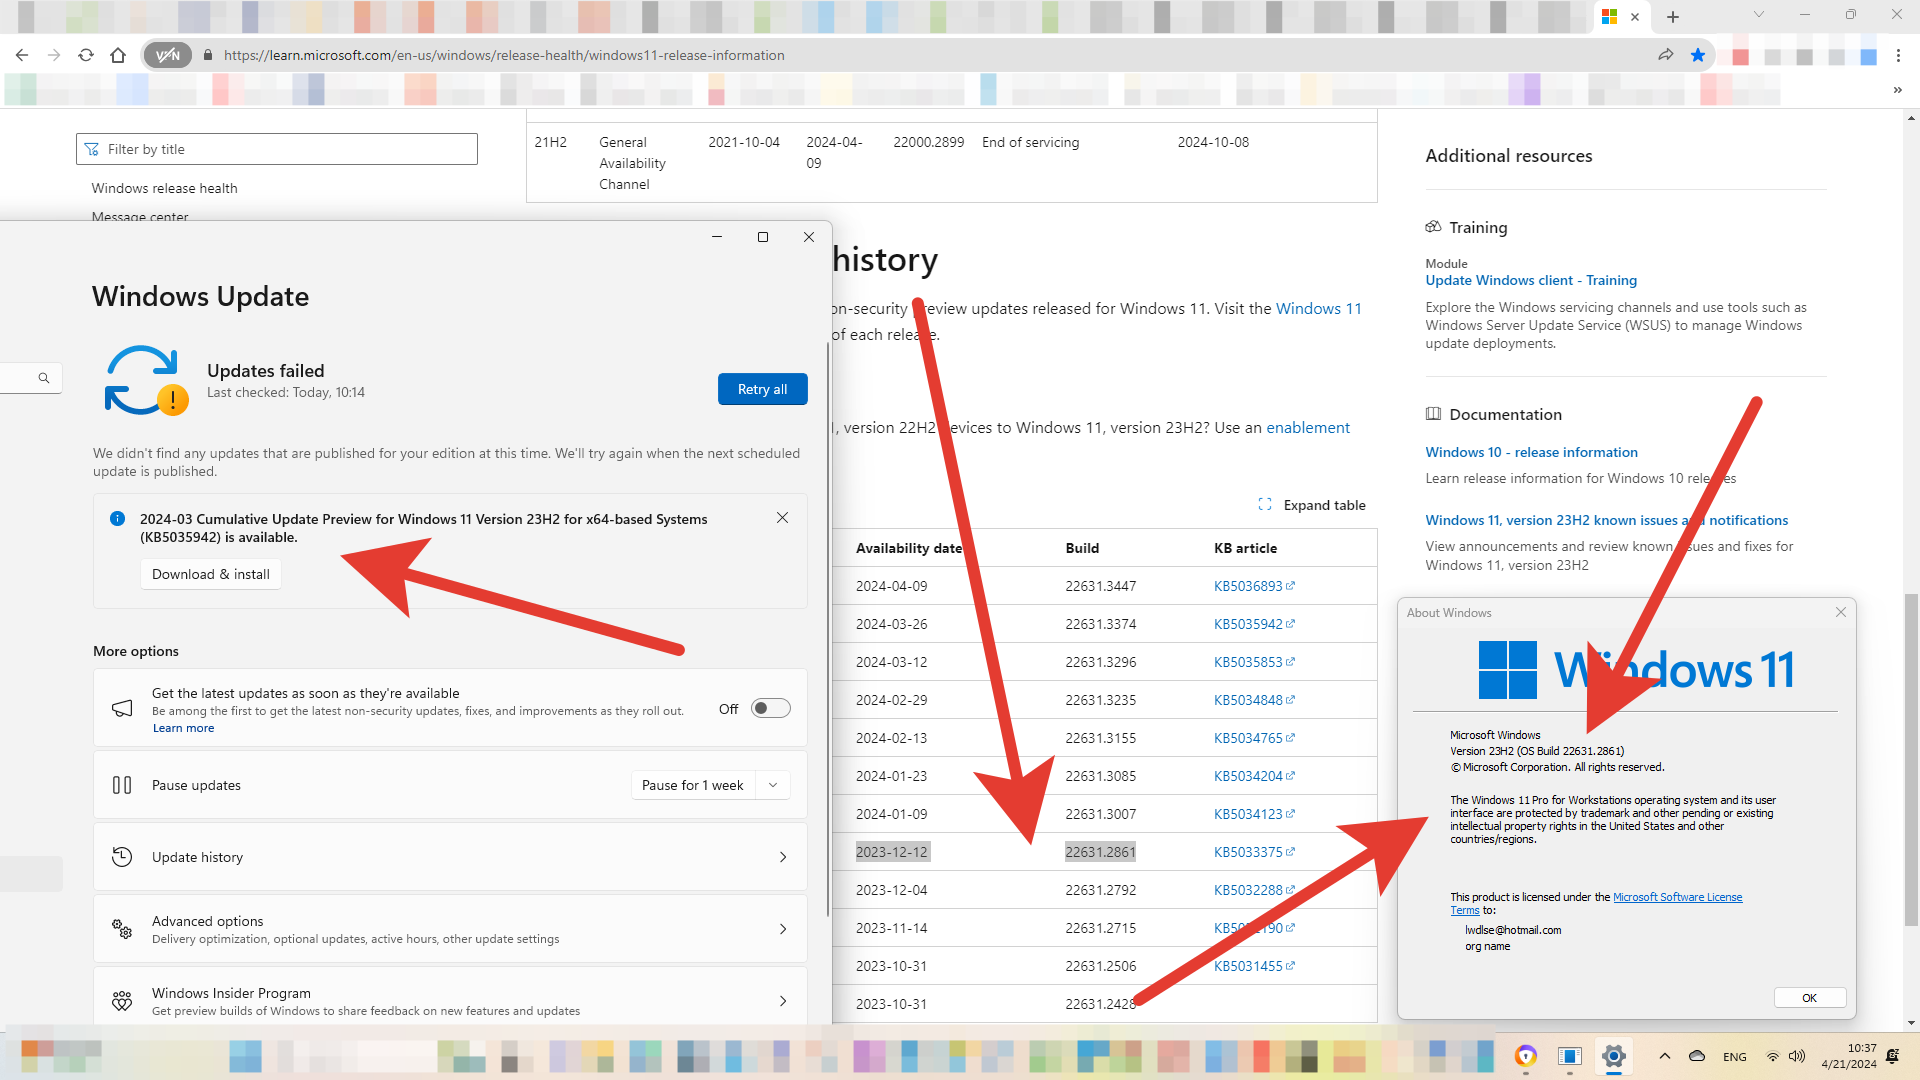
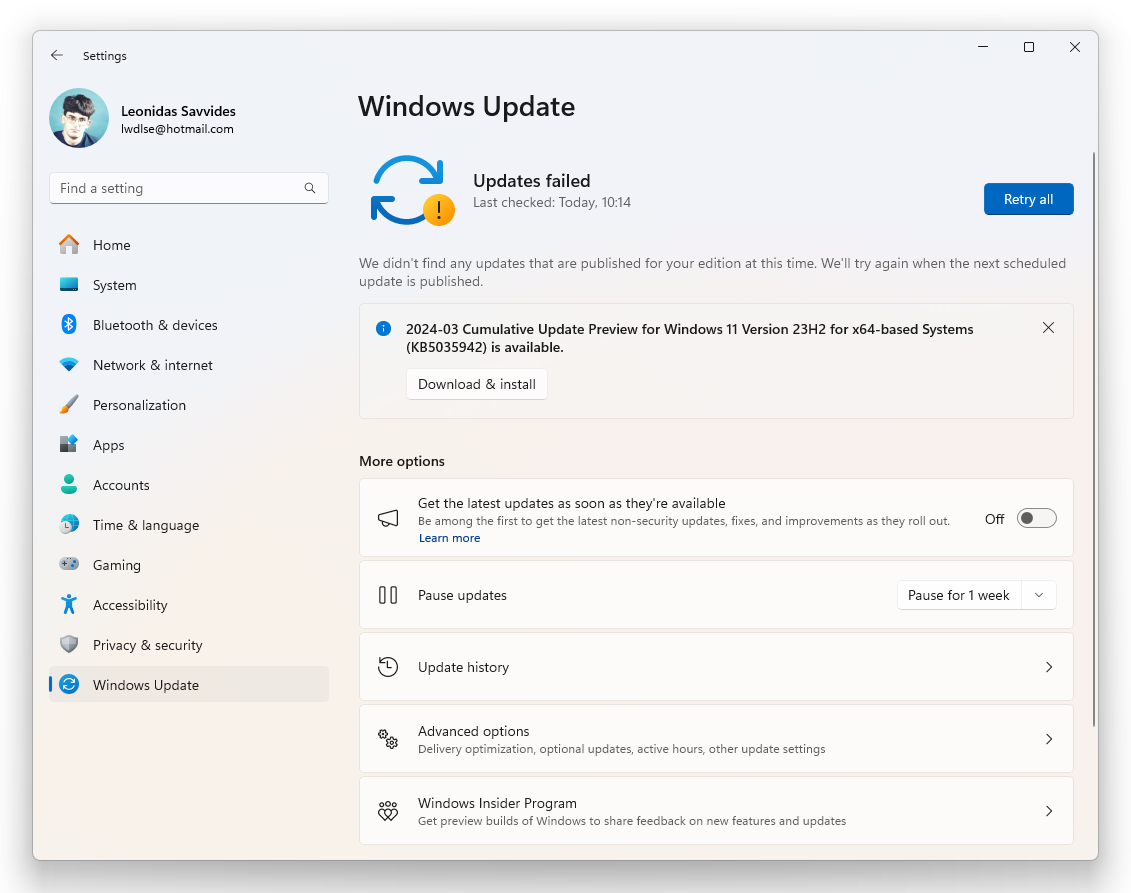
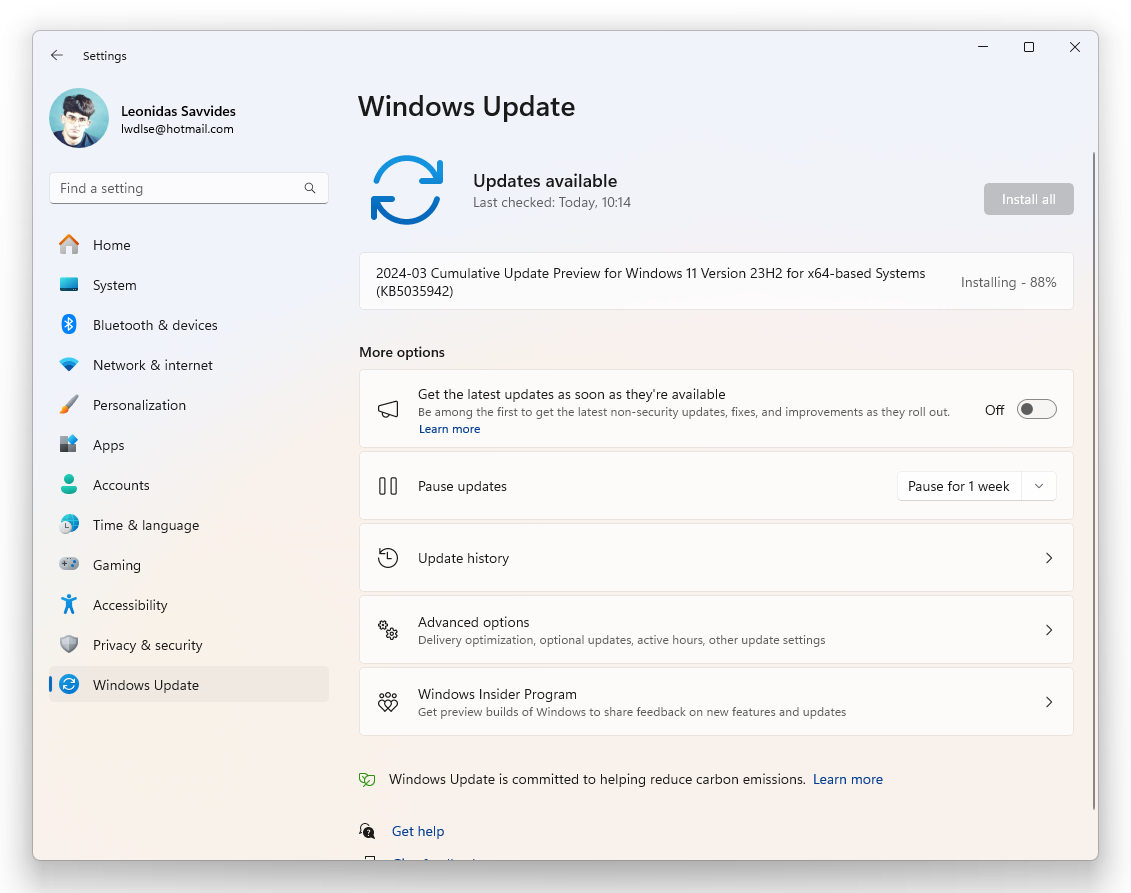
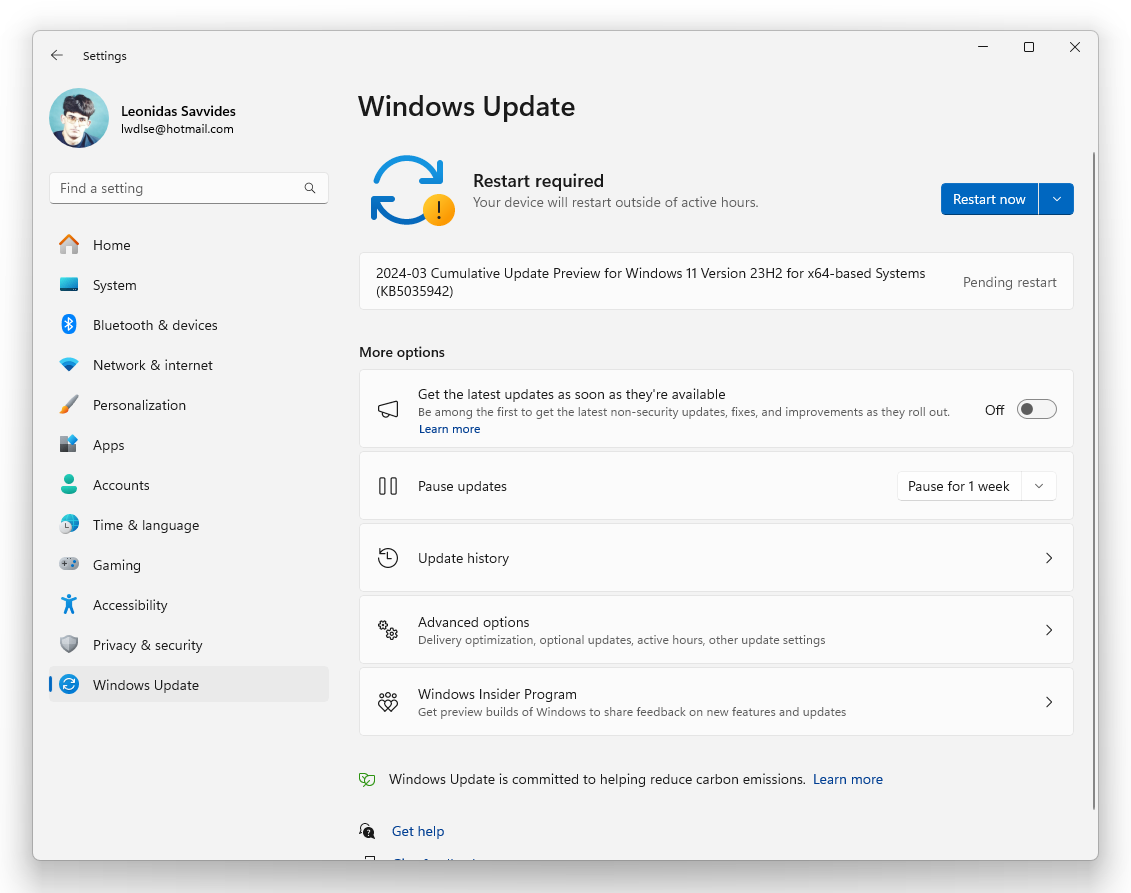
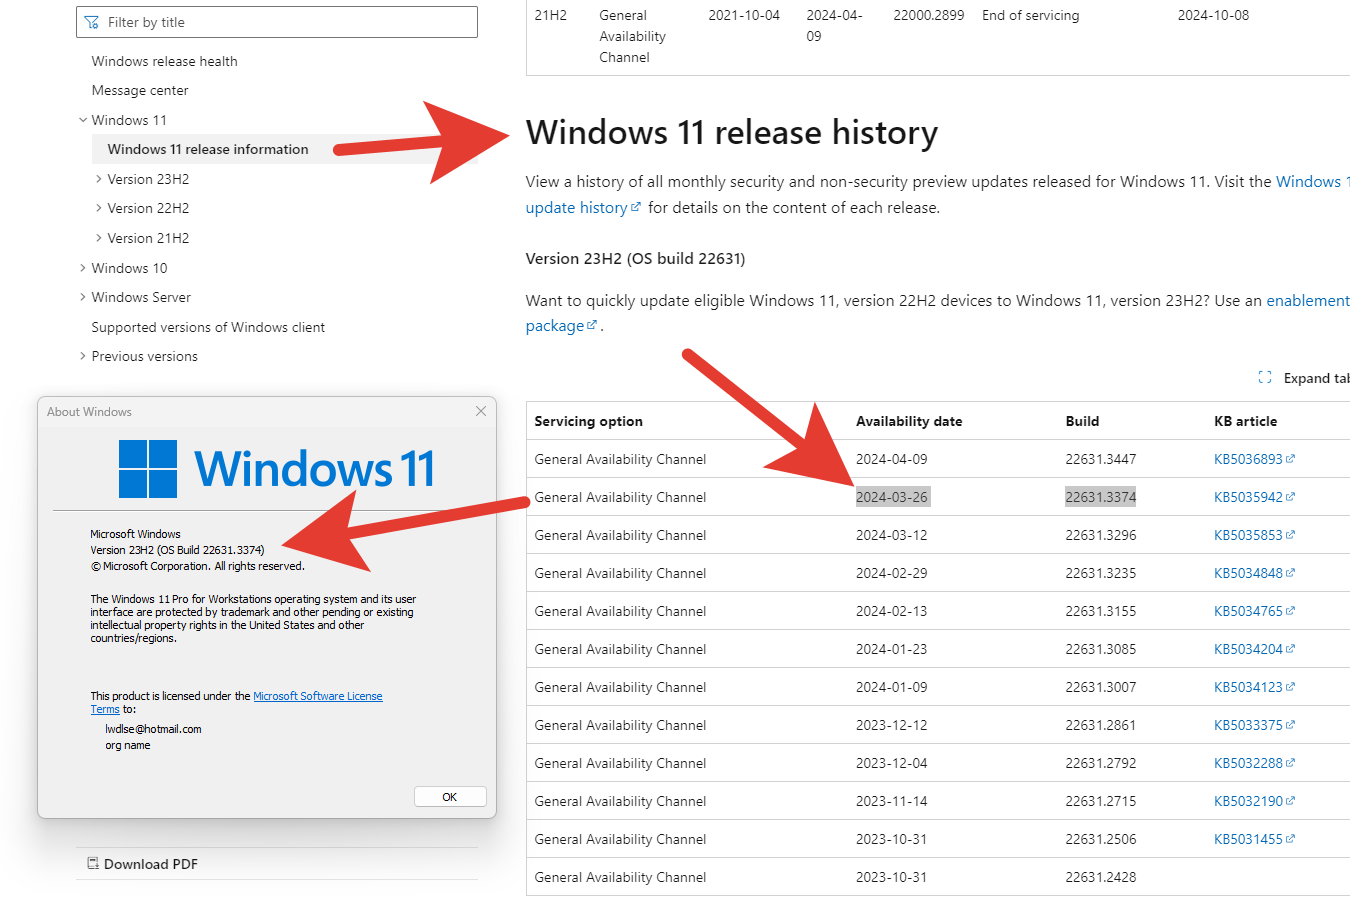
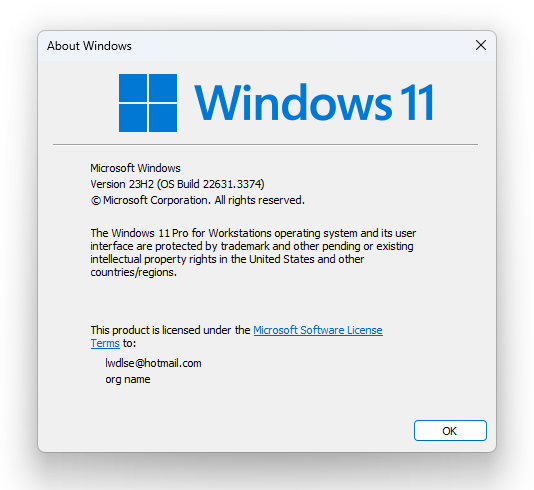
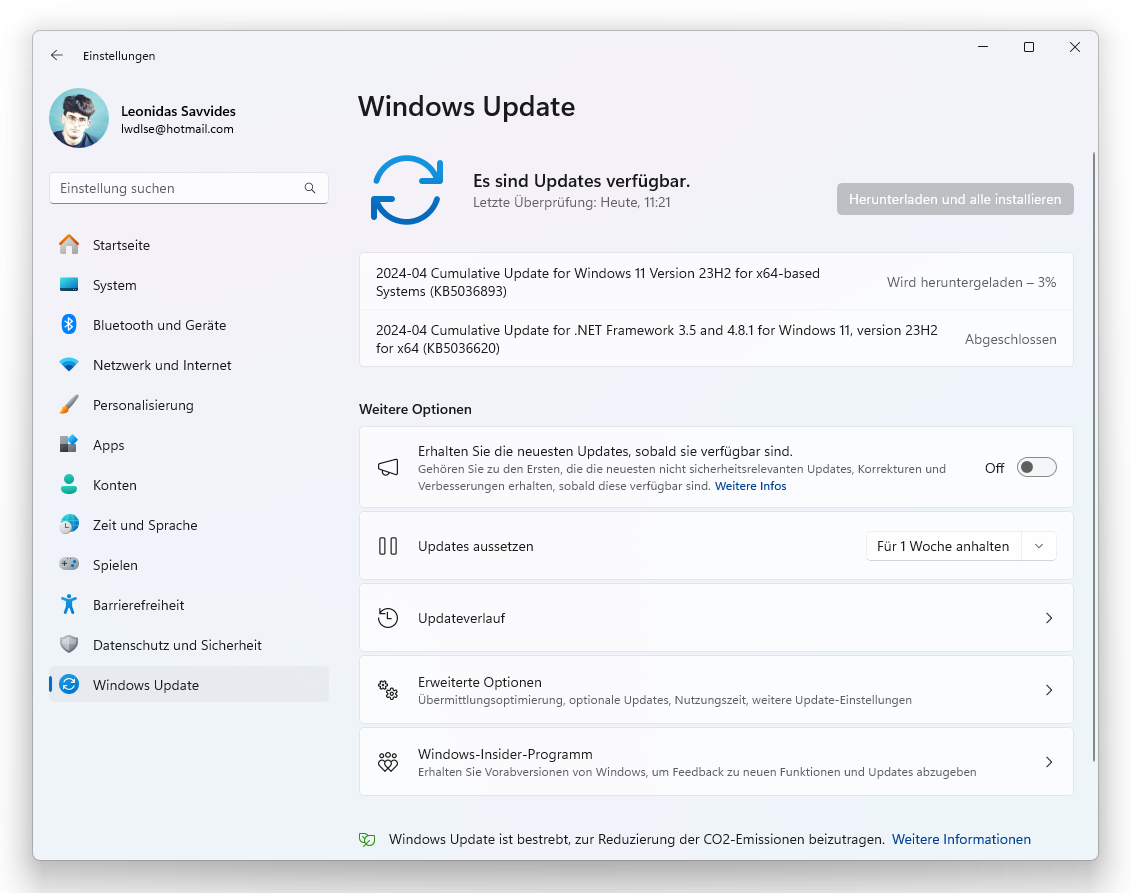
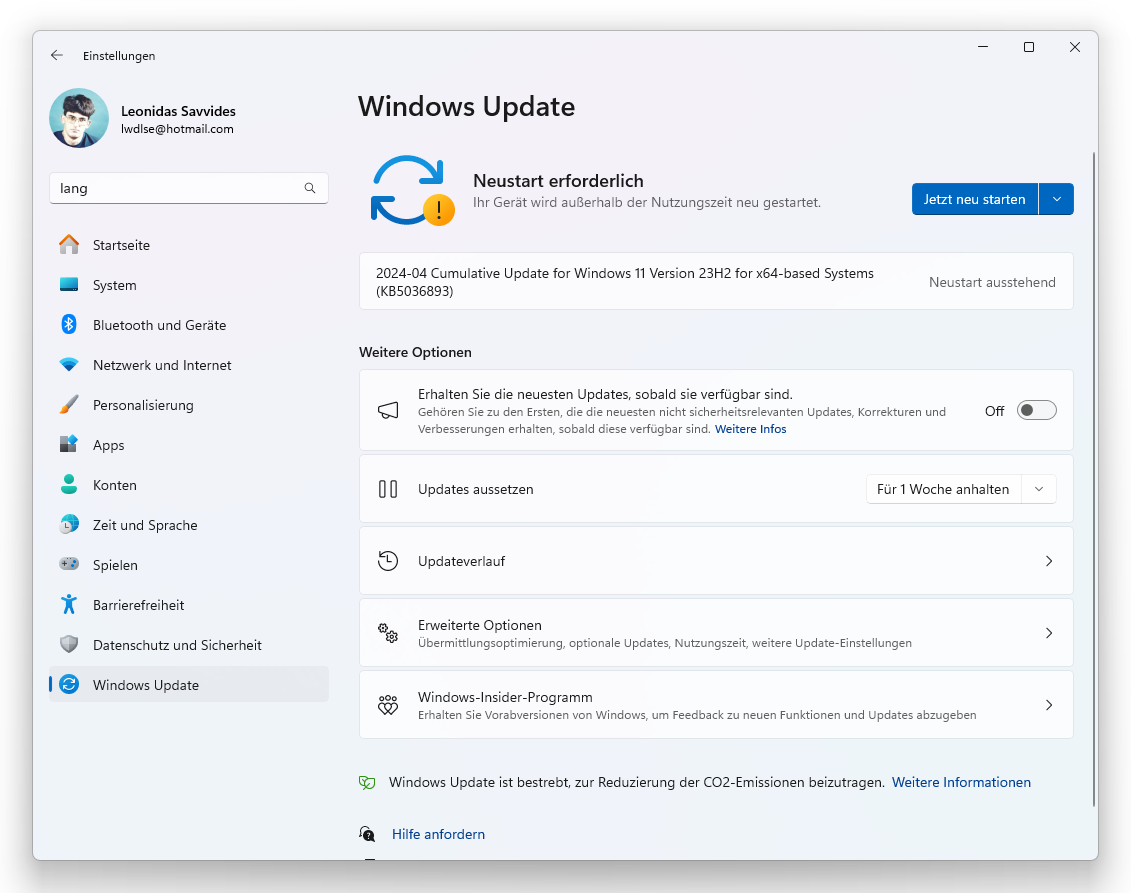
4- After upgrading from 22H2 to 23H2, Win-11 Pro for Workstations, some minor updates may be needed
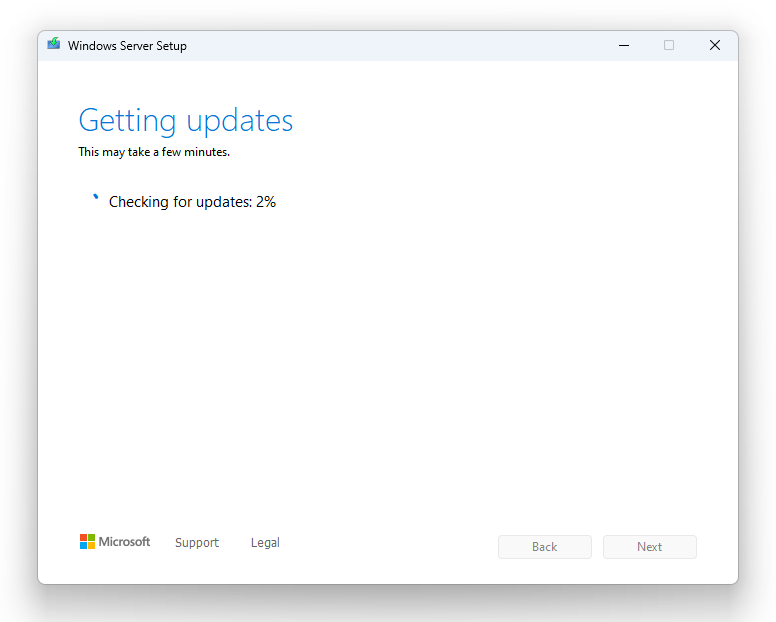
You proceed normally for minor updates – there is no check for unsupported hardware. See below shots:
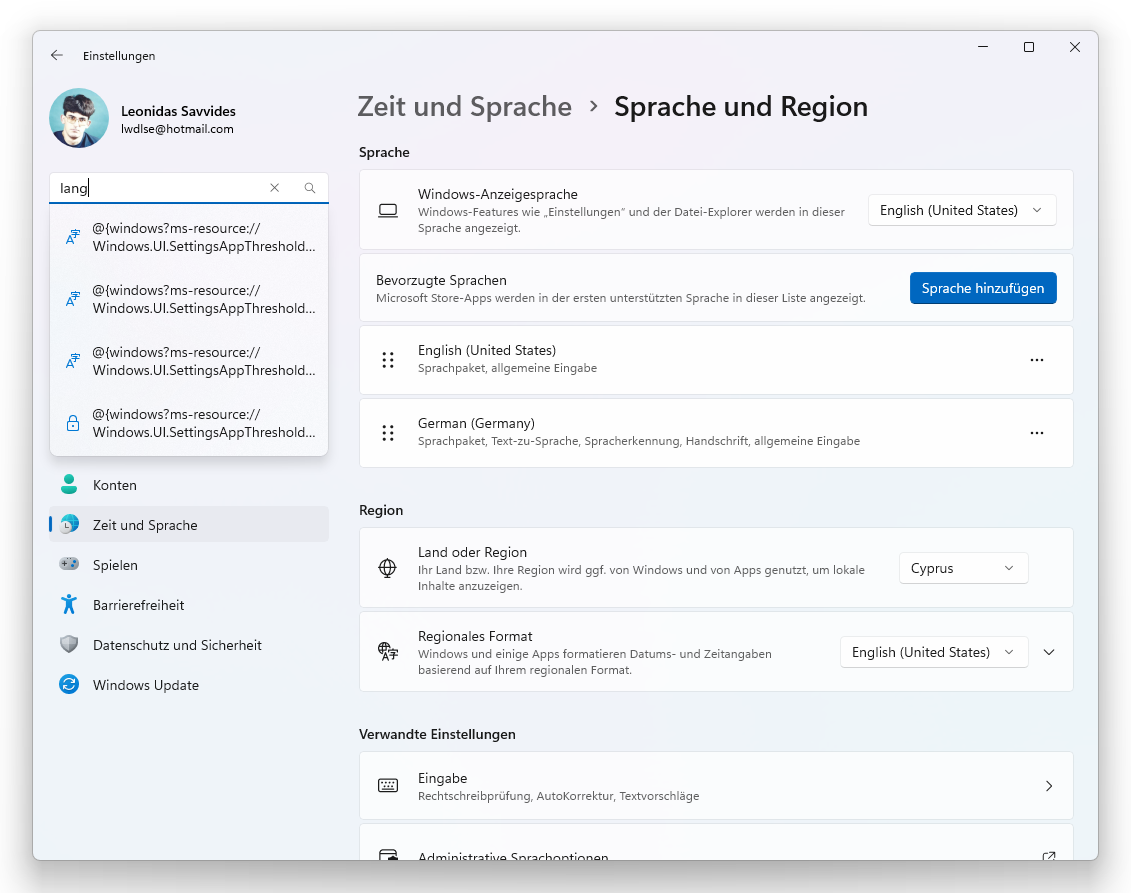
here are some German words involved, for unknown reason:
You can search in Settings for “lang”, normally if you log out, re-login, or restart the PC, when prompted – some of the screen words may be in German but you will understand the RESTART Button is self-explanatory.
====
Thank you!
Please share this article with your friends on Social Media!
5- Buy Cheap Software keys – Windows 11/10 Pro for Workstations, Windows 11 Pro, Home, etc. **
where D:\htdocs_xampp\Homestead the Homestead directory, after entering this directory:
d:
cd d:\htdocs_xampp\Homestead
Next, execute the bash init.bat command from the Homestead directory to create the Homestead.yaml configuration file. The Homestead.yaml file is where you will configure all of the settings for your Homestead installation. This file will be placed in the Homestead directory: if there is a problem with the